Open Editor
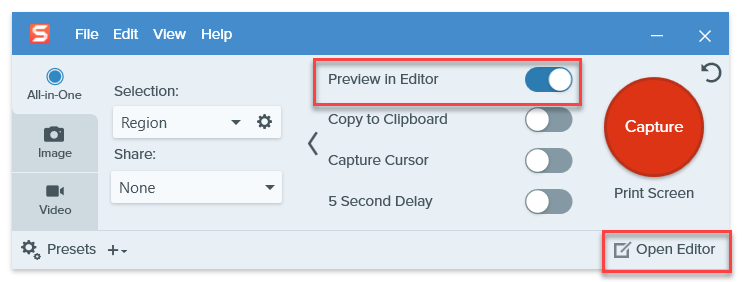
To open the Editor, click Open Editor on the bottom right corner of Snagit. Alternatively, toggle Preview in Editor on will automatically open the Editor after every capture.

Editor Interface

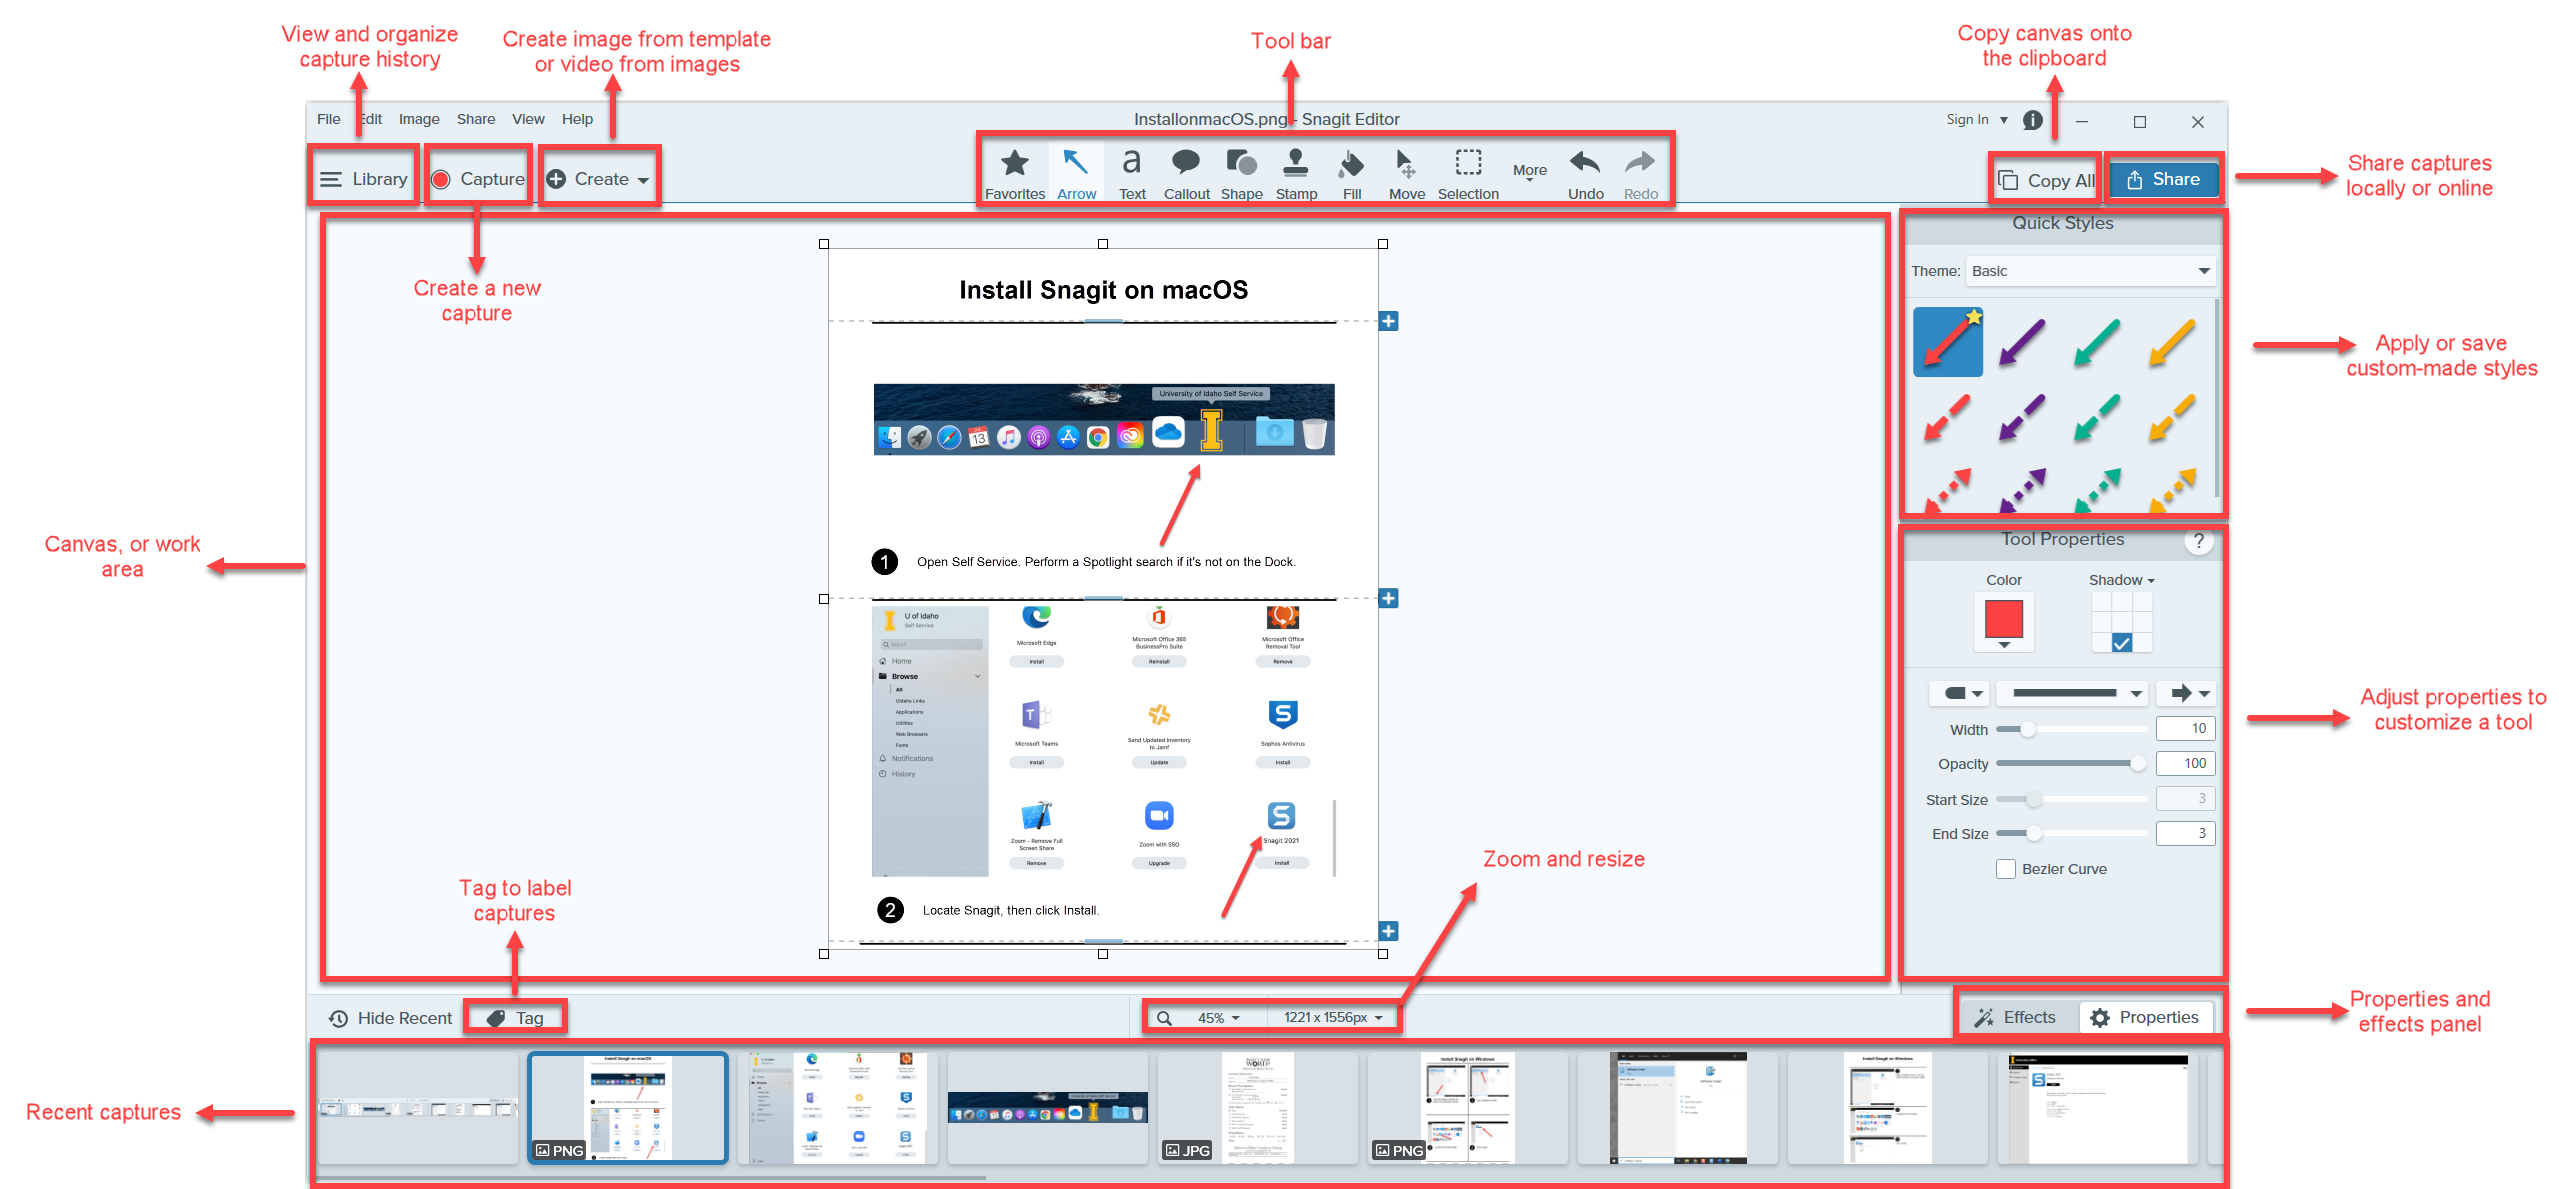
The library allows you to browse and search for past captures based on date (month and year), applications, websites, or tags.
The Capture button allows you to open the Capture window to start a new capture.
The canvas is the working area to preview and edit captures.
Zoom allows you to change the size of the canvas, and resize allows you to change the size of the image.
The toolbar allows you to annotate, edit, and enhance image captures. You can customize the order and tools available in the toolbar by clicking More -> Customize Toolbar.
Tools
The default tools are described below:
- Favorites – Save and access frequently-used Quick Styles to Favorites for quick access.
- Arrow – Add an arrow to call attention or highlight an item in the image.
- Text – Add captions, headings, or other text to an image.
- Callout – Call attention or highlight an item in an image. Callouts include an annotation plus text.
- Shape – Add a shape or frame to an image. You can choose the shape, outline and fill color.
- Stamp – Annotate an image with Snagit’s default stamps.
- Fill – Fill a flattened area in an image with another color.
- Move – Select any object to move on the canvas. Enable Smart Move to make objects selectable on your screen or to identify text that can be replaced or deleted.
- Selection – Select parts of an image. After making a selection on the canvas, you can cut, copy, move, delete, edit, or apply effects to the selection.
More tools are available when clicking the More dropdown in the Snagit Editor toolbar.
- Blur – Add a blur to hide or mask sensitive information.
- Crop – Remove unwanted areas from the edges of an image.
- Cut Out – Delete a vertical or horizontal section out of an image and joins the two pieces together.
- Eraser – Erase any flattened area in an image to expose the canvas.
- Highlighter – Click and drag to highlight a rectangular area in an image.
- Line (Windows Only) – Add a straight or curved line to an image.
- Magic Wand – Select an area on the canvas based on color. The tool is ideal for selecting areas of a single color that do not include complex backgrounds or patterns.
- Magnify – Magnify an area on the canvas to highlight or show the details.
- Pen – Draw freehand lines on an image.
- Simplify – Replace text and other visual elements in an image with simplified objects to focus viewers’ attention on the important elements in an image.
- Step – Add a series of numbers or letters in sequence to an image.
- Spotlight (Mac only) – Call attention to an area by dimming and/or blurring the rest of the image.
Click this link for a detailed description of each tool.
Create Image from Template and Video from Images

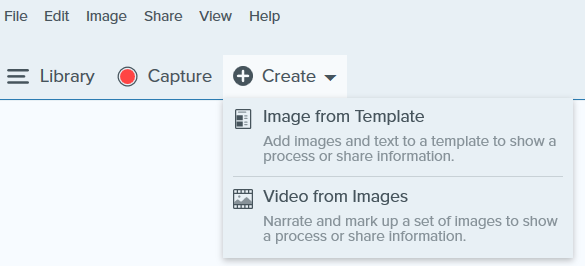
Snagit offers two ways to quickly create images and videos for sharing information. Click Create next to the Capture button in Snagit Editor.
- To create an image, choose Image from Template. Choose a template, then drag captured images to drop zones. Or, select multiple images in the recents tray, then right click and select Combine in Template. You can resize the images, add and swap sections, edit or delete the titles, captions, and footers.
- To create a video, choose Video from Images. Or, select multiple images in the recents tray, then right click and select Create Video from Images. In the recording toolbar, you can choose to change video background color, record microphone audio, show the cursor, and turn the webcam on or off. During recording, you can pause or stop the recording and use the quick styles drawing tools for annotation. After recording, you can make edits by trimming the unwanted parts.
Share Images and Videos

The Share button is located on the top right of Snagit Editor. The common destinations are listed below:
- File – Use this option to save locally. You can also choose File -> Save As… from the Editor’s menu.
- Clipboard – Use this option to save to the clipboard, and you can paste the saved media to another application, such at Outlook.
- Word – Use this option to save to an opened or new Word document, such as syllabus.
- PowerPoint – Use this option to save to an opened or new PowerPoint slides, such as class presentation slides.
- OneDrive – Use this option to save to U of I’s cloud storage solution for personal use.
- SharePoint – Use this option to save to U of I’s cloud storage solution for collaboration with colleagues in the college/department.