Saving, Sharing, Exporting, and Archiving
Save your project early and save it often. Navigate to File, then choose Save or Save As….
Saving as a Local File

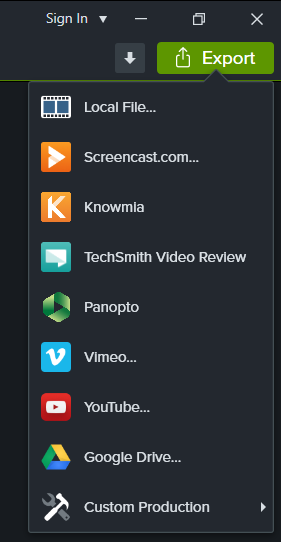
To export a video as a local file, navigate to Export, then choose Local File… and choose MP4 only (up to 720P) or MP4 only (up to 1080P) as the standard option. For more configuration options, choose Custom production settings.
If the video contains interactivity such as hotspots and quizzes, exporting requires a specific process to ensure that the final video would retain the functionalities. Navigate to Export, then choose Local File…, select one of the options with MP4 with Smart Player and make sure that the Report quiz results using SCORM box is checked if the video will be uploaded to Canvas.
Sharing to YouTube
To upload a video to YouTube, navigate to Export, then choose YouTube…. Once you sign in, you can add a title and a description. If you added markers on the timeline, you can check the Create table of contents from markers box to generate automatic chapters based on the markers for the final YouTube video. If you want to publish to YouTube but don’t have a google account or only have a personal account, I recommend create a google account for work purposes.
Other Sharing/Exporting Options

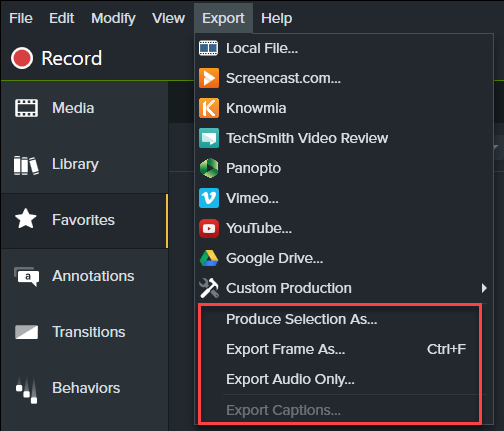
In addition to saving as a local file and sharing to YouTube, you can also choose to navigate to menu, then select Export to export image, audio, or caption files locally.
Export Frame As…to save the currently selected frame at your playhead’s position as an imageExport Audio Only…to save the entire project as an audio fileExport Captions…to save the captioned file in either .srt or .smi format. Note that this option is only available if you have added captions to your project.
Archiving Your Project
To archive your project in case that you need to revisit it in the future, navigate to File, Export, Zipped Project…. Rename the file to indicate that it’s an archived version, then click Save.